Imagine you've just returned from vacation to find your hardwood floors covered in water after a pipe burst. You might wonder if it's even possible to restore them to their former glory. While quick action can help mitigate the damage, the extent of the water impact can vary greatly, leading to different restoration needs. So, what steps should you take to assess the damage and determine whether your floors can be saved? The answers might surprise you as you investigate the various restoration methods and their implications for your home.
Understanding Water Damage Effects

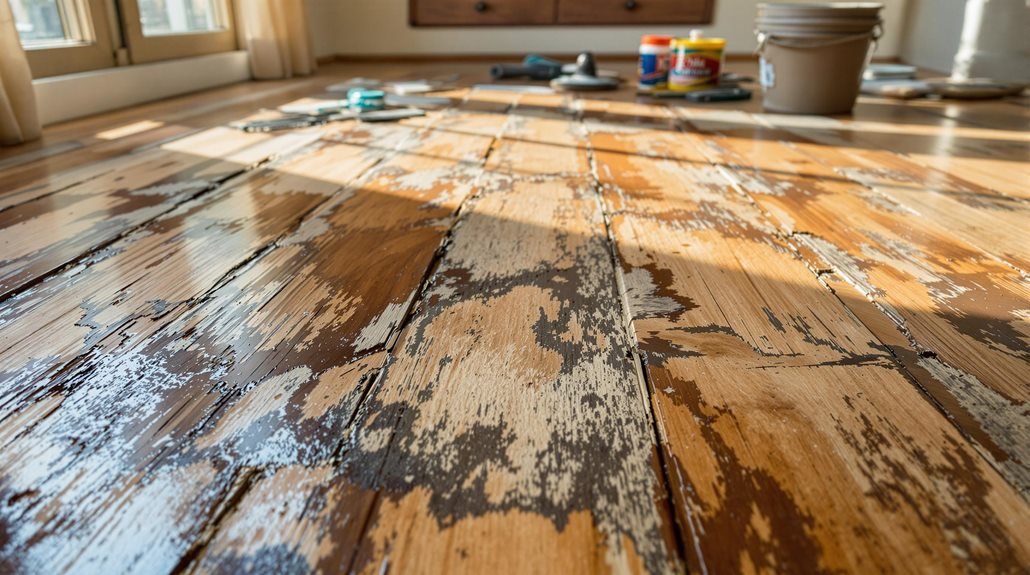
When it comes to hardwood floors, understanding the effects of water damage is vital for effective restoration. Your beloved wooden planks can absorb water like a sponge at a beach party, leading to serious moisture retention issues. When the wood absorbs water, it expands, causing those once-proud boards to warp and swell. Imagine your floor throwing a tantrum due to the fact it just can't handle the splash zone!
It's important to recognize that hardwood isn't just a pretty face; it's a living, breathing material that reacts to its environment. If you've got a leak or an unexpected indoor pool, the longer the water lingers, the worse the damage becomes. Prolonged exposure can lead to issues like mold growth and structural compromise—definitely not the kind of growth you want in your home!
Assessing the Extent of Damage
After experiencing water damage, the first step is to evaluate the extent of that damage to your hardwood floors. Grab a flashlight, and let's play detective! Look for damage indicators such as warping, buckling, or discoloration. If your once-proud floors now resemble a wavy sea, you've got a problem on your hands.
Next, check for any soft spots or areas that feel spongy underfoot—these could be signs of deeper issues, like mold or rot. Don't be shy; a gentle poke can reveal a lot! If you notice any foul odors, it's likely that moisture has taken up residence, leading to potential restoration nightmares.
Now that you've gathered evidence, you can start considering suitable restoration techniques. Depending on the severity, you might be looking at simple drying and refinishing or a more extensive repair job involving replacement boards. Remember, evaluating the damage accurately can save you time, money, and a lot of headaches. So put on your Sherlock Holmes hat, gather your findings, and get ready for the next phase. Your hardwood floors deserve a second chance, and you're just the person to give it to them!
Immediate Actions to Take
As soon as you've assessed the damage to your hardwood floors, it's crucial to act quickly to minimize further issues. Your initial response can make all the difference between a minor inconvenience and a major disaster. Here are some emergency measures you should take right away:
- Shut off the water source: If you can, stop the flow of water—your floors will thank you.
- Remove furniture: Get those chairs and tables outta there! They won't float, and neither will your sanity.
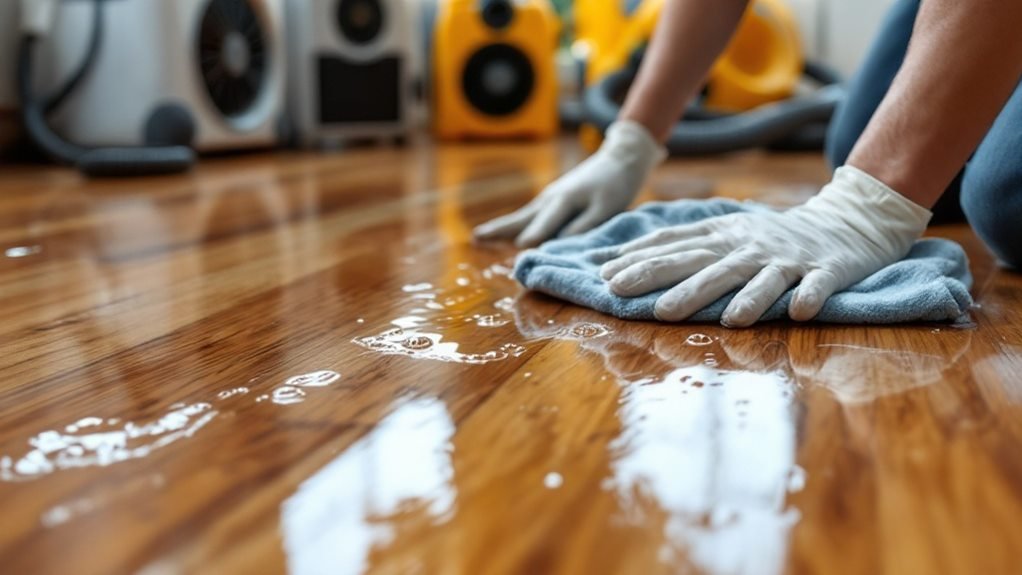
- Dry the area: Use fans and dehumidifiers to kick the moisture out, like a bad roommate.
- Check for mold: Keep an eye out for any fuzzy intruders. If you see mold, it's time to call in the pros.
- Document the damage: Snap some pics for insurance claims. You wanna show them how your beautiful floors turned into a swamp!
Methods for Restoration
Restoring hardwood floors after water damage involves several key methods that can help you reclaim your space. First, you'll want to employ effective drying techniques. Start by using fans and dehumidifiers to pull moisture from the air and the wood itself. This isn't a race; give it time, or you might end up with warped floors that could double as a mini roller coaster.
Once the floors are dry, it's time to assess the damage. If you've got minor warping or cupping, sanding the surface may be all it takes. Grab your sander and get to work, but don't channel your inner lumberjack—keep it smooth and even.
Now, let's talk surface treatment options. You can choose between refinishing with polyurethane or oil-based products. If you're feeling adventurous, a stain can add flair while providing protection. Just remember, applying these treatments can be like putting on sunscreen—too thick, and you'll look like a shiny tomato.
Professional vs. DIY Restoration
When deciding between professional restoration and a DIY approach for your water-damaged hardwood floors, consider your expertise and experience in handling such repairs. Weigh the costs of hiring a professional against the potential expenses and time involved in doing it yourself. You'll likewise want to assess the time and effort you can realistically commit to guarantee a thorough restoration.
Expertise and Experience
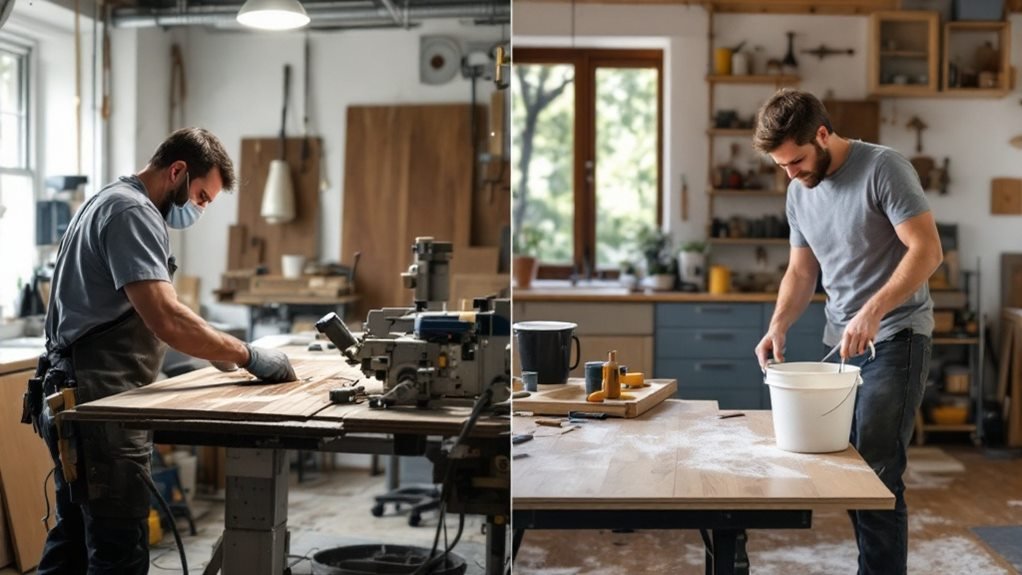
Water damage restoration for hardwood floors often presents homeowners with a critical choice: hire a professional or tackle the project yourself. While DIY restoration can be tempting, it's vital to weigh your skills against the specialized knowledge required for effective restoration.
Consider the following when deciding:
- Expert Techniques: Professionals are well-versed in restoration techniques that protect your flooring materials from further damage.
- Equipment Access: They have access to advanced equipment that you might not find at your local rental store—goodbye, back pain!
- Quality Assurance: Pros guarantee their work, giving you peace of mind that your floors will be restored to their former glory.
- Time Efficiency: Let's face it, your weekends are precious. Pros can often complete the job faster than you can say "water damage."
- Long-Term Value: Investing in a professional can save you money in the long run by preventing costly mistakes.
In the end, if you've got a knack for DIY, you might manage a small fix. But for significant damage, calling in the experts is often your best bet—unless you fancy a new hobby in flooring disasters!
Cost Considerations
Deciding whether to hire a professional or take the DIY route for hardwood floor restoration involves a careful evaluation of the associated costs. If you opt for professionals, expect to shell out anywhere from $3 to $8 per square foot. That's a hefty sum, but you're paying for their expertise—unless you enjoy the thrill of watching YouTube tutorials while holding a sledgehammer.
On the flip side, DIY restoration can save you some cash, but don't forget to factor in the costs of tools, materials, and possibly a few band-aids. If you mess it up, you might end up spending more on repairs than if you had just called in the pros. And let's not forget about insurance coverage; some policies might cover professional restoration, making it a more attractive option.
Time and Effort
Often, the time and effort required for hardwood floor restoration can greatly vary between hiring professionals and taking the DIY approach. If you're considering going the DIY route, brace yourself for some serious time management and effort estimation. Sure, you'll save money, but you might find yourself knee-deep in sawdust and wondering why you didn't just call in the pros.
Here's what to expect, whether you're wielding a sander or a credit card:
- Professional Restoration: Typically, they'll handle everything in a matter of days, while you sip coffee and contemplate your life choices.
- DIY Restoration: You're looking at potentially weeks of work, especially if you enjoy procrastination as a hobby.
- Skill Level: Professionals are trained to get it done right; you may require YouTube tutorials and several cups of coffee.
- Equipment: Renting or buying tools can take time and effort, not to mention the risk of injury if you're not careful!
- Finish Time: Professionals can achieve a beautiful finish faster; with DIY, you might end up with a "rustic" look—if that's your goal!
Ultimately, weigh your options wisely before diving in!
Preventing Future Water Damage
To prevent future water damage to your hardwood floors, you need to implement regular maintenance practices that include checking for leaks and ensuring proper sealing. Control moisture levels in your home by using dehumidifiers and ensuring good ventilation in high-humidity areas. Furthermore, always respond quickly to any leaks you find to minimize potential damage before it escalates.
Regular Maintenance Practices
Regular maintenance practices are crucial for safeguarding your hardwood floors against future water damage. Think of your floors as the delicate prima donnas of your home; they need attention and care to keep them looking fabulous. Here are some practical tips to guarantee your hardwood stays dry and dazzling:
- Use proper cleaning techniques: Sweep or vacuum regularly to remove dirt and debris that can scratch your floors. When mopping, use a damp mop with a gentle cleaner—no soaking, please!
- Apply protective finishes: A good finish acts like a superhero cape, protecting your wood from spills and moisture. Reapply as needed to maintain their shine.
- Check humidity levels: Keep indoor humidity between 30-50% to prevent warping or cupping. Think of it as your floor's comfort zone!
- Wipe up spills immediately: Like your favorite snack at the movies, don't let them linger! Quick action can save your floors from absorbing moisture.
- Inspect regularly: Check for any signs of damage or wear. It's much easier to fix small issues than to deal with major disasters.
Proper Moisture Control
Controlling moisture is essential for preserving the integrity of your hardwood floors and preventing future water damage. To start, consider installing moisture barriers in areas prone to humidity, like basements or bathrooms. These barriers act like a superhero cape, shielding your floors from unwanted moisture intrusion.
Next, keep an eye on humidity levels in your home. Ideally, you want those levels to hover between 30% and 50%. If they start climbing higher than a cat on a curtain rod, it's time to take action. Use dehumidifiers or air conditioners to maintain a stable environment. Trust me, your floors will thank you by staying intact and not resembling a soggy sponge.
Additionally, check for leaks regularly—those sneaky little drips can cause havoc over time. Confirm that your plumbing is in tip-top shape and that appliances aren't leaking like a faucet in a comedy sketch.
Lastly, be mindful of spills. Clean them up quickly, as nobody wants their hardwood floors to feel like they've just taken a swim in a kiddie pool. With these strategies, you'll keep your hardwood floors happy and dry!
Quick Leak Response
Swift action is crucial when it comes to leak response, as even a minor drip can lead to significant water damage over time. You know that old saying, "A stitch in time saves nine"? Well, in this case, it's more like a towel on the floor saves your hardwood!
Here's how you can guarantee your leak detection game is on point and your emergency response is swift:
- Inspect Regularly: Keep an eye out for damp spots or water stains. If you see it, don't ignore it!
- Know Your Pipes: Familiarize yourself with your plumbing system. Knowledge is power, especially when you're racing against time.
- Seal Vulnerable Areas: Caulk around faucets and pipes to prevent leaks from sneaking up on you.
- Install Water Sensors: These nifty devices can alert you to water where it shouldn't be—perfect for the paranoid homeowner!
- Create an Emergency Plan: Knowing who to call and what to do can save you from a soggy disaster.
Cost Considerations for Restoration
When considering the costs associated with restoring hardwood floors after water damage, it's essential to assess both immediate expenses and potential long-term implications. You'll want to start by getting restoration estimates from professionals, as they can vary widely based on the extent of damage and local labor rates. Don't be surprised if you feel like you're ordering a fancy coffee—this could range from a few hundred to several thousand dollars!
Now, let's talk about insurance coverage. If you're lucky enough to have a policy that covers water damage, it can greatly offset your out-of-pocket costs. Nevertheless, keep in mind that not all policies are created equal, so read the fine print. You wouldn't want to realize your insurance covers everything but the floors—talk about a plot twist!
Additionally, consider the cost of preventive measures for the future. Investing in moisture barriers or proper drainage may seem like a hefty price now, but it's a lot cheaper than replacing your hardwood floors again next year. So, do your assignments, get those estimates, and weigh your options wisely—your wallet will thank you!
When to Replace Hardwood Floors
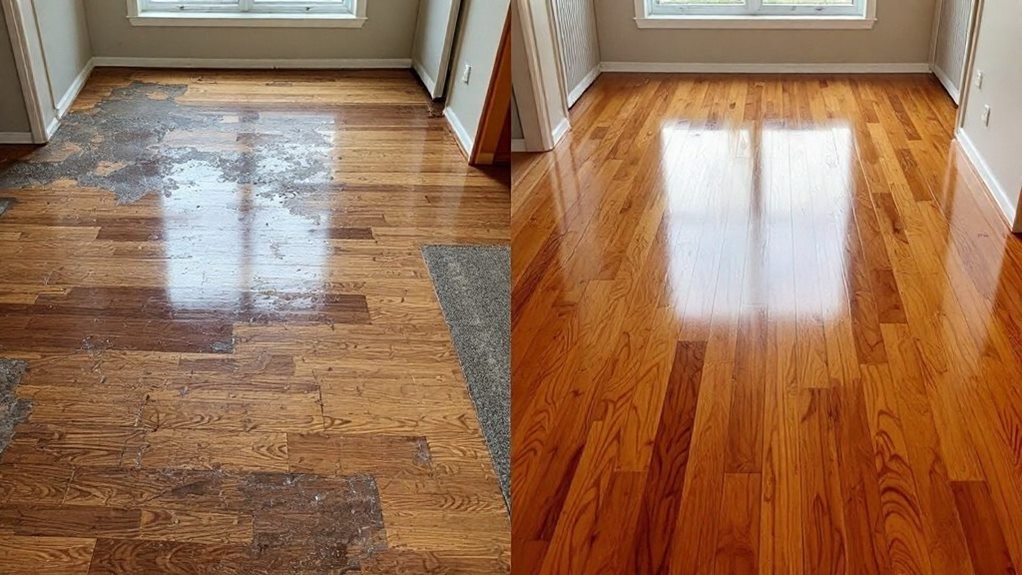
Determining whether to replace hardwood floors after water damage hinges on several key factors. You've got to assess the extent of the damage and consider the hardwood lifespan. Sometimes, the floor looks like it's been through a water park ride gone wrong. Other times, it's just a little soggy. Here are some signs that scream "replacement" louder than your neighbor's dog at 3 AM:
- Severe warping: If your floor resembles a rollercoaster track, it's time to wave goodbye.
- Mold growth: If you see green stuff growing, it's not a science project you want to keep.
- Persistent odor: If your floor smells worse than your gym shoes, that's a problem.
- Loose or buckling boards: If they're dancing around, they're not going to stay put.
- Irreparable damage: If the floor's gone beyond repair, it's time to bring in the big guns.
In short, when you see these signs, it might be time to replace rather than restore. Don't let water woes ruin your hardwood dreams—act before it becomes a soggy nightmare!
Frequently Asked Questions
How Long Does It Take to Restore Water-Damaged Hardwood Floors?
Restoring water-damaged hardwood floors typically takes one to three weeks, depending on drying techniques and restoration methods used. You'll want to stay patient, but hey, at least you'll have a great story to tell!
Can I Use a Dehumidifier During the Restoration Process?
Yes, you can definitely use a dehumidifier during restoration. It helps with moisture control, reducing the risk of mold and warping. Plus, your floors will dry faster—just think of it as a moisture-fighting superhero!
What Type of Finish Is Best After Restoration?
Oh sure, you could just throw on any finish type and call it a day! But really, for durability, consider water-based polyurethane. It complements restoration techniques beautifully, ensuring your floors shine and withstand daily life's chaos.
Will Insurance Cover Hardwood Floor Water Damage Restoration?
When dealing with hardwood floor water damage, check your insurance policies. Coverage limits vary, and some might not include restoration costs. Don't forget to read the fine print—insurance loves hiding surprises like a magician!
How Can I Tell if My Hardwood Floors Are Beyond Repair?
Did you know 30% of hardwood floor damage goes unnoticed? Inspect for warping, discoloration, or mold—these are key damage indicators. Use floor inspection techniques like tapping and visual checks to determine if your floors need help.
Conclusion
In the quest to restore your hardwood floors, think of it as a delicate performance between water and wood—one misstep can lead to lasting damage. By acting swiftly and choosing the right restoration method, you can breathe new life into your floors. Whether you opt for a DIY approach or enlist professionals, remember that careful assessment and prevention are key. With the right action, your hardwood can stand tall once more, much like a phoenix rising from the ashes.
Recent Comments